What are the advantages? Our iPhone app is free, it sends full-resolution photos as opposed to sending them via text messaging, and it will notify you when your recipient opens the file.
Here is how to use it.
1. Download the 'EMail Large File' app.
2. Go to your iPhone Settings, select 'EMail Large File' in the list.
Enter an e-mail address you want to use for return receipts. We often call them delivery notifications. It's because they are sent once your recipient opens or downloads the file you sent them. Those messages are only sent once per submission, so don't worry about getting multiple e-mails.
3. Launch the EMail Large File app.
Tap on [Photo Library], and select a photo from your iPhone gallery.
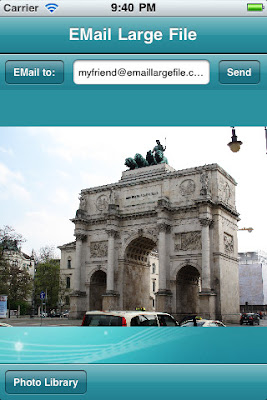
Next, tap on [EMail to:] to select a recipient address.
Alternatively, you can type the e-mail address manually if you don't have it in your address book.
Finally, tap on [Send] to upload and send the file.
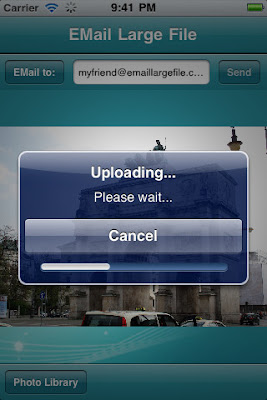
4. After a few seconds or minutes, depending how fast your internet connection is (we recommend using WiFi) you will see the "success" message.
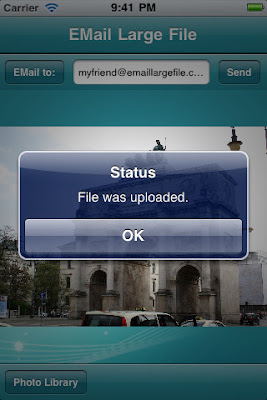
At this point, your file is on our server, and your buddy is sent an EmailLargeFile.com link to the file.
The link will be active for 7 days. If your recipient views the photo before the link expires, we will send you the delivery confirmation to the e-mail address you entered in step #2.
Important: please be aware that depending on your mobile plan your provider (including AT&T or Verizon) may charge you extra for transferring files or data. That's why we recommend using WiFi whenever possible for browsing Internet or using file transfer services such as EmailLargeFile.com.


